
Since the invention of 3D printing in the 1980s, the technology has progressed rapidly. 3D printers today can print models as small as the width of a human hair or as large as a car. They can make structures out of all different sorts of materials: metals, plastics, concrete, wood, sugar, or even chocolate. Because of the 3D Printing’s precision and versatility, all different types of businesses have adapted 3D Printing into their work. For example, high tech construction companies have begun 3D printing buildings and medical professionals are building patient-specific prosthetics, implants, and developing tissue and organs. 3D Printing will certainly be an important technology for the future; its real world applications continue to grow everyday.
As the technology continues to develop, the cost continues to fall. In the past, 3D printers were so expensive that few had the chance to use them. Now companies are selling 3D printers specifically designed for printing at home! But how exactly does 3D printing work? In this blog I will teach you how to make your own 3D print. I’ll show you how to build a name tag.
Every 3D print must begin with a computer model: the printer needs to know what to print. There are many 3D modeling softwares that can aid in your 3D design. At Spark Skill summer camp, we use Tinkercad to introduce 3D modeling to students. Conceptualizing objects in 3D space can be difficult at first, but Tinkercad makes visualization easy. To use Tinkercad yourself, you will need to make a free Autodesk account. Students will need parental assistance. The sign up button is in the top right corner of the Tinkercad homepage.
After making an account, you’ll be thrown into a quick tutorial. Feel free to try out it out. You can skip it as well. I explain all the basic controls in my tutorial.
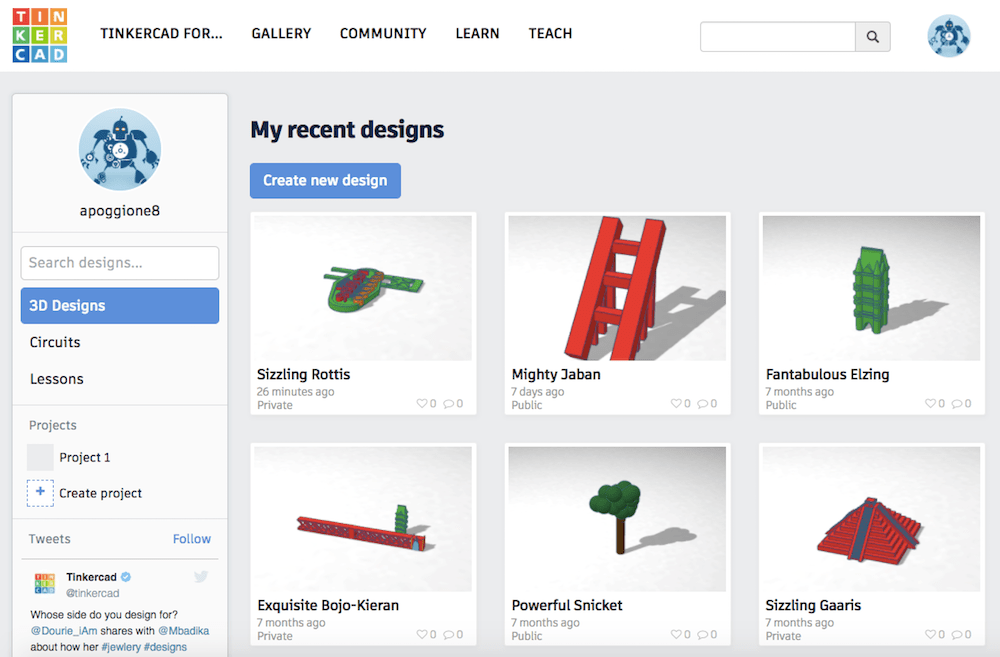
Click on the tinkercad logo in the top left to exit the tutorial and to land on your Tinkercad homepage. Click the blue “create new design” button to begin your first design, which I’ve shown in the picture below. Your homepage will be empty at first, whereas my homepage features a few of the projects I’ve been working on at Spark Skill.
Hitting the “create new design” button will open a new empty workplane.
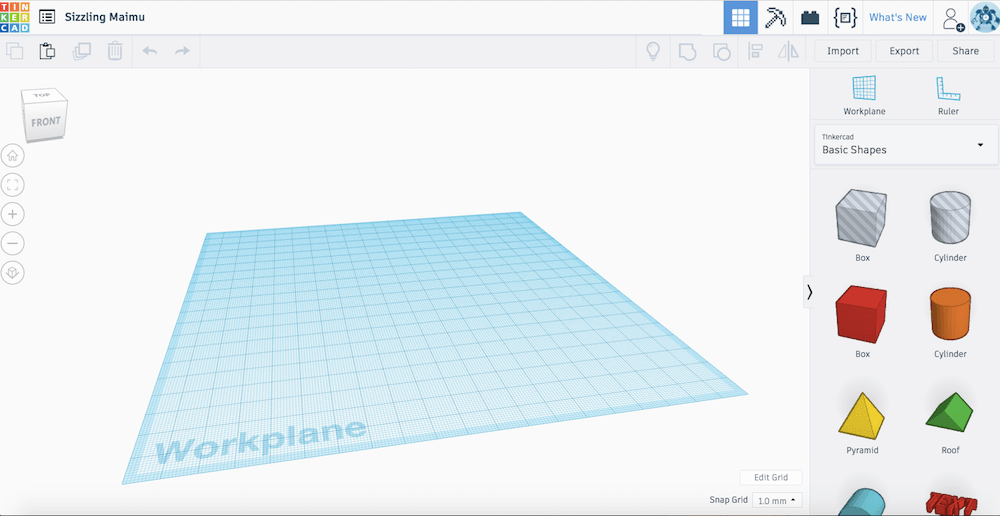
Before you begin placing any shapes in the workspace, notice two things. First, Tinkercad will have randomly generated a silly name at the top of your workspace. This design was given the title “Sizzling Maimu.” You can change your title simply by clicking on it. Second, familiarize yourself with rotating and zooming in the workplane. The controls at the top left area good place to start. You can zoom with the plus and minus buttons and rotate the workplane by clicking and dragging the cube at the top left corner of the screen.
I strongly recommend also learning to use keyboard shortcuts. Instead of using the buttons at the top left corner, scroll in and out with your mouse to zoom in and out of your workplane. Right click and drag your workplane around to rotate it. Before you move on to later steps in this guide make sure you know how to manipulate the space. These skills will be important as you continue using Tinkercad. If you’re struggling at all with the mechanics behind Tinkercad, check out the Tinkercad tutorial available here. Seeing someone else interact with the software should help!
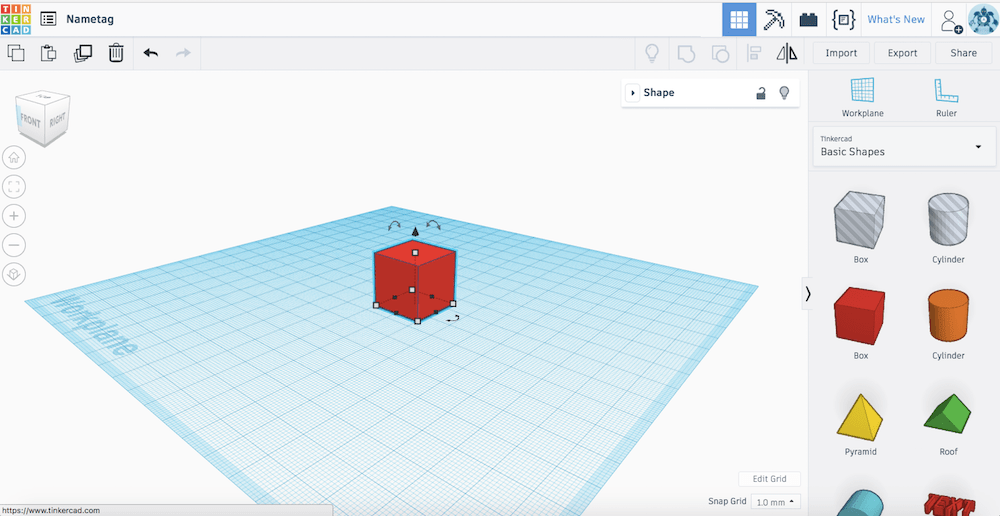
Now you can drag out your first shape from the right toolbar: a box. Go ahead and drop the box toward the middle of the workplane.
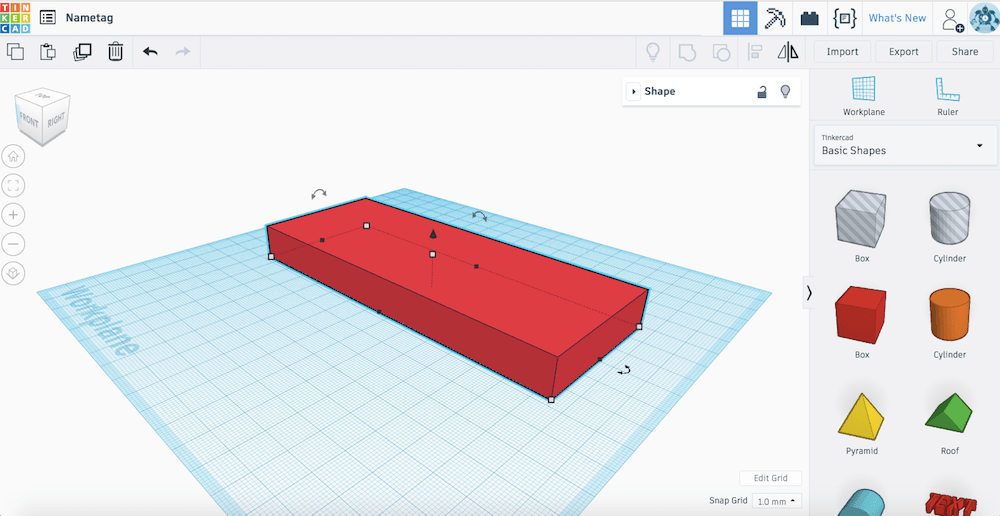
My name isn’t going to fit on this box. Use the sizing handles to make this cube into more of a rectangular prism. Try to make your box look like my box in the picture below. Notice how the black sizing handles and the white sizing handle on the top of the cube change the size of in only one dimension. Grabbing the other white sizing handles will change both the length and width of the base of the box. Try using both the black and white sizing handles to see what I mean.
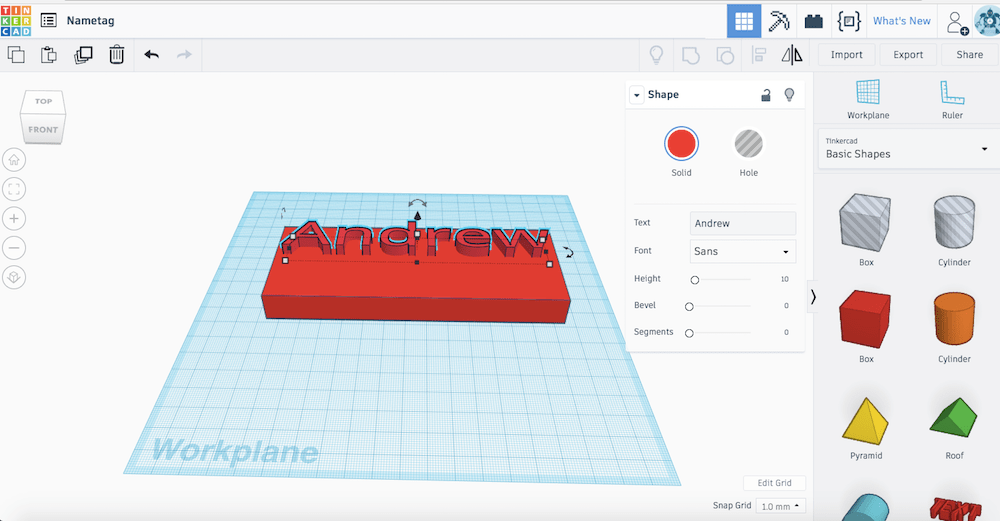
Now that you have created your name tag base. Let’s bring out letters for your name. Click and drag out the “TEXT” basic shape. This is another red block which can be seen at the bottom right of the basic shapes in the picture above. Place the “TEXT” shape next to your name tag base. Type in what you want the top of your name tag to say in the field “Text” which I have highlighted with a red arrow. Feel free to change your font as well. I ended up changing mine to the Sans font.
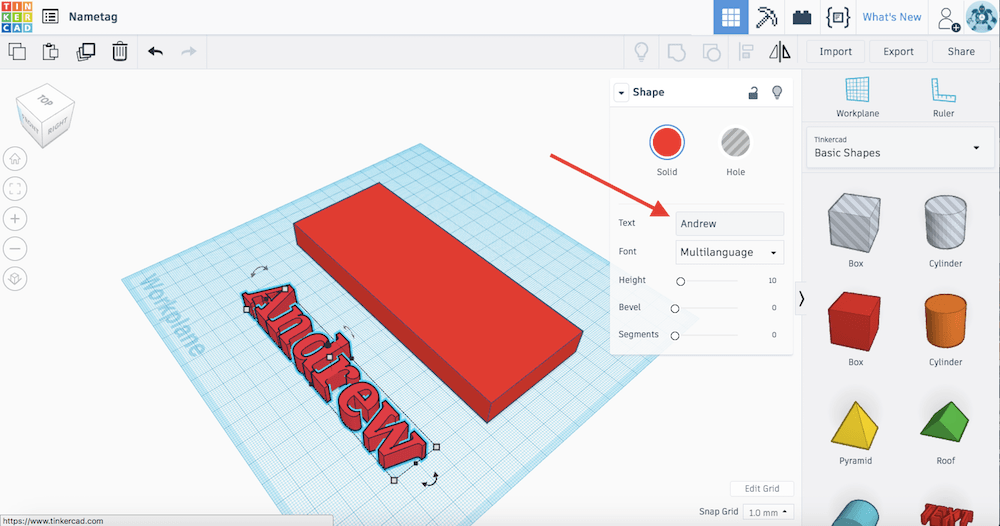
Size up your name so that is half as tall your name tag base and almost as long like in the picture below.
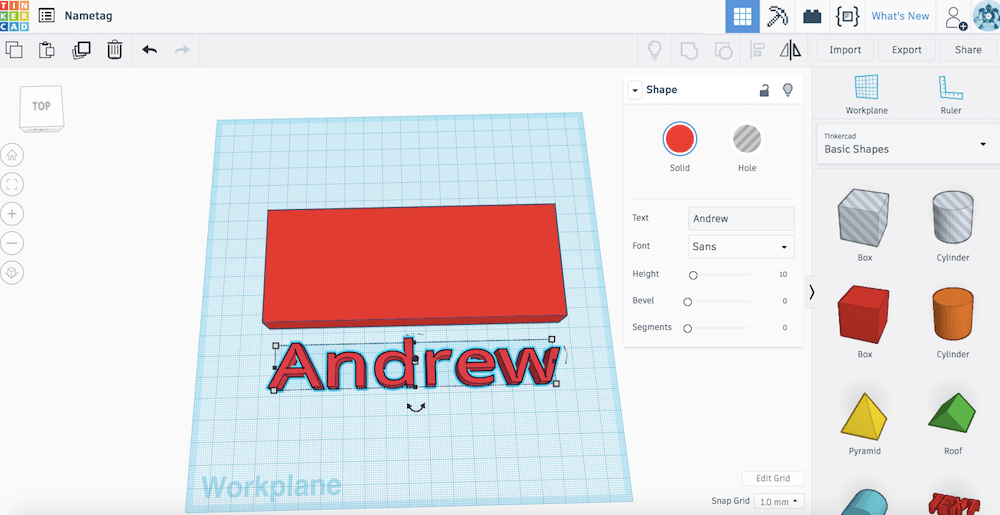
Now you need to put this name in position. Drag the name into the base. You should notice that the text seems to disappear.
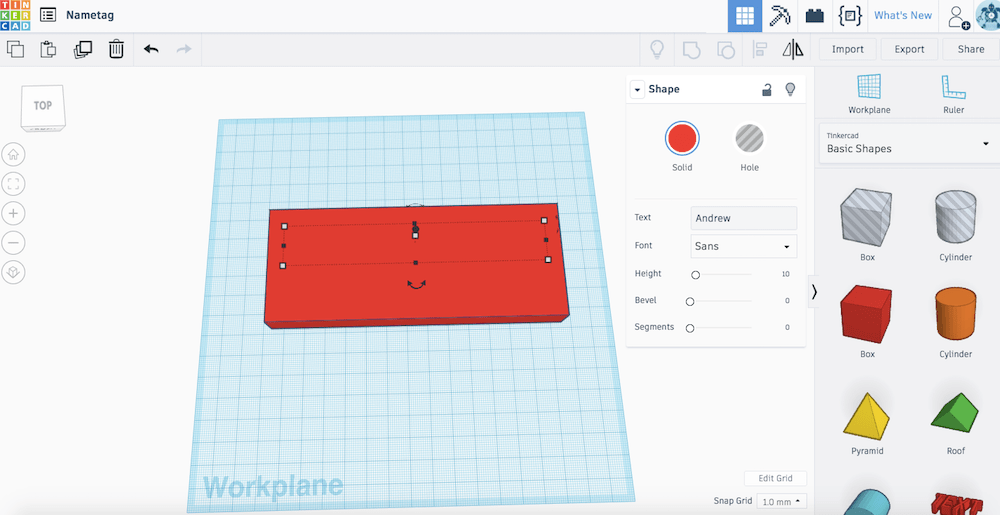
This happens because our text needs to be lifted up higher so that it sits on top of the base. Raise the text up with the black arrow handle at the top is circled in yellow in the next screenshot.
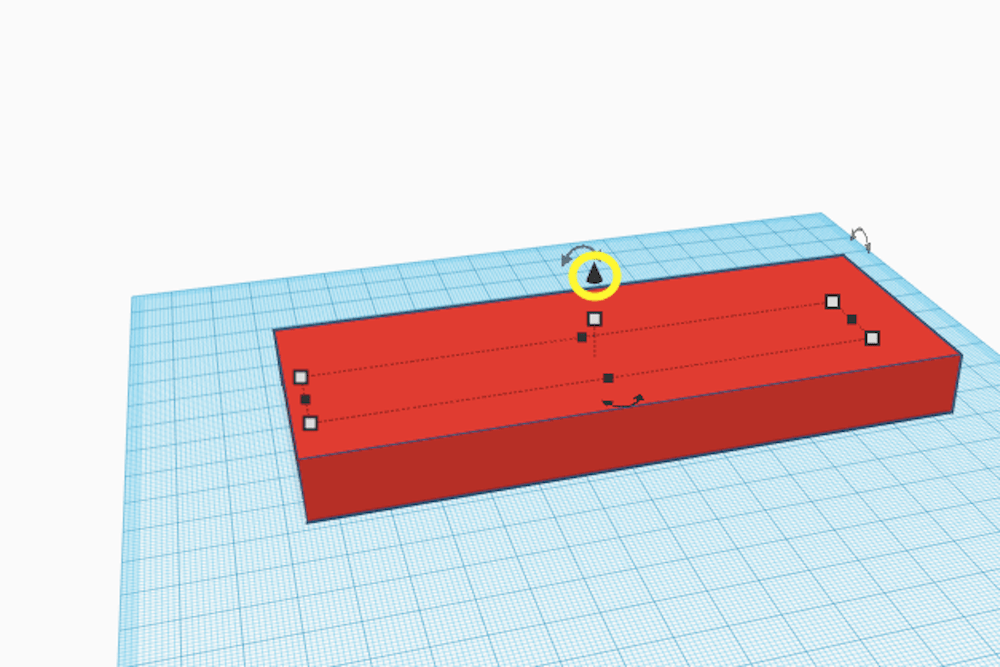
Click and hold on the arrow handle while moving your mouse upward. This will drag the text to your desired position. Make sure that the letters are still in contact with the base. If there is a gap between the text and the base, they will not print together as one piece.
*note: If you “lose” your text inside the base during this process, just drag the base to a new position in the workplane. Your text will be revealed as you move the base away.
Now that your first name is in place, let’s fill out the bottom half of the name tag base. For the bottom half you should carve the name into the base rather than have it stick out. To do this you will need to understand how to turn shapes from solid to holes.
Drag out another text basic shape. Write whatever you would like in the text like before. I am going to write my last name. Next, change this shape from solid to hole as shown below.
![]()
To place our hole into the base, try raising the hole up first. You won’t “lose” your shape in the base this way. Raise your holed out text halfway up the name tag base.
Now move the text into the base.
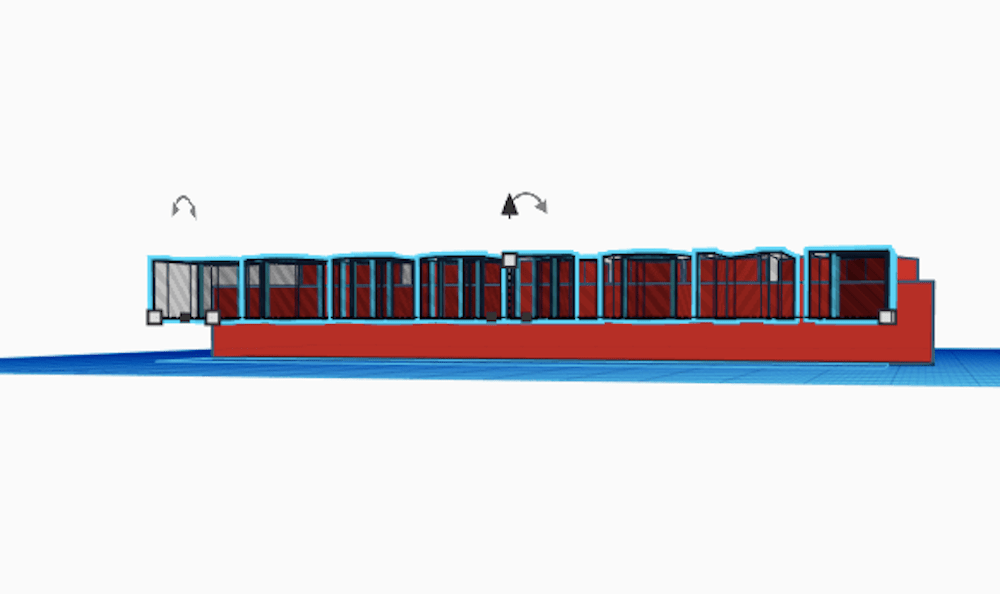
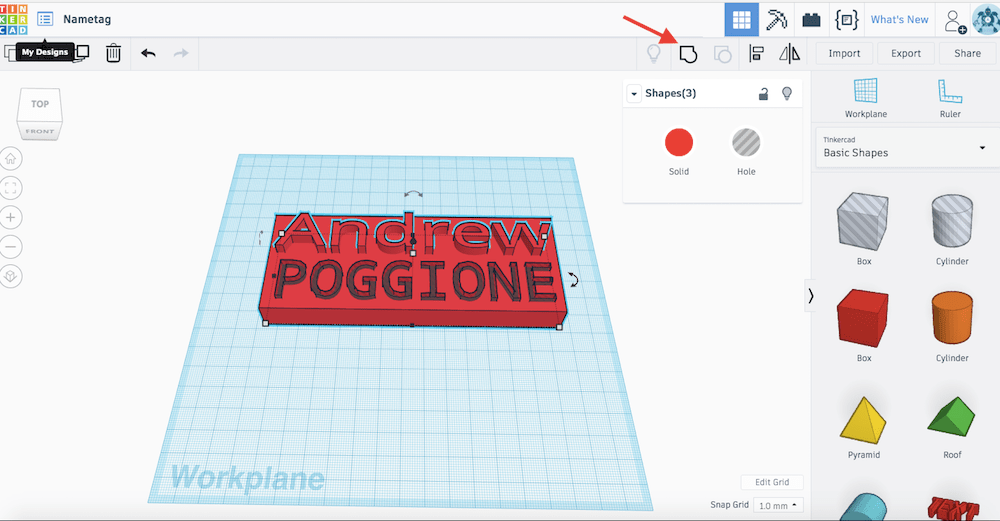
To see what your final model will look like, group the objects together. Drag a box around your entire creation. Everything should be selected. Then press the group button.
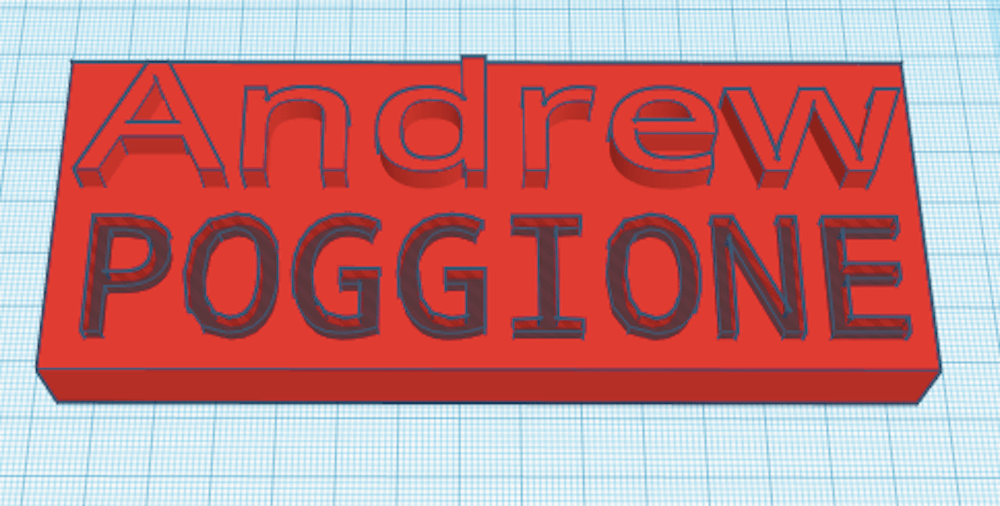
Now that you have grouped the objects together notice how the bottom letters engraved your name tag. Any space taken up by your hole text disappeared.
Finally you can add some flare to your nametag. Add some triangular prisms to the ends of our nametag. In Tinkercad these shapes are green and are called roofs. This step will introduce you to the rotation handles in Tinkercad.

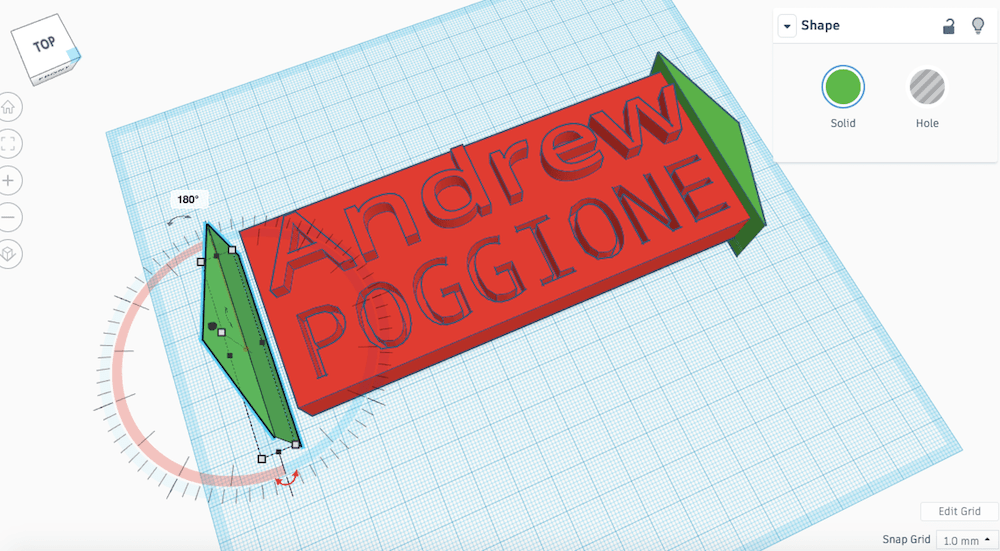
Find the green roof shape piece and drag it into the workplane. Unfortunately notice your roof is not facing the right direction to connect to your nametag base. You will need to rotate the shape using the rotation handles. Click and hold each rotation handle, notice how each rotation handle changes the way the shape rotates. You need the triangular to face upward so grab the rotation handle highlighted in red and shown below to rotate the shape 90 degrees.
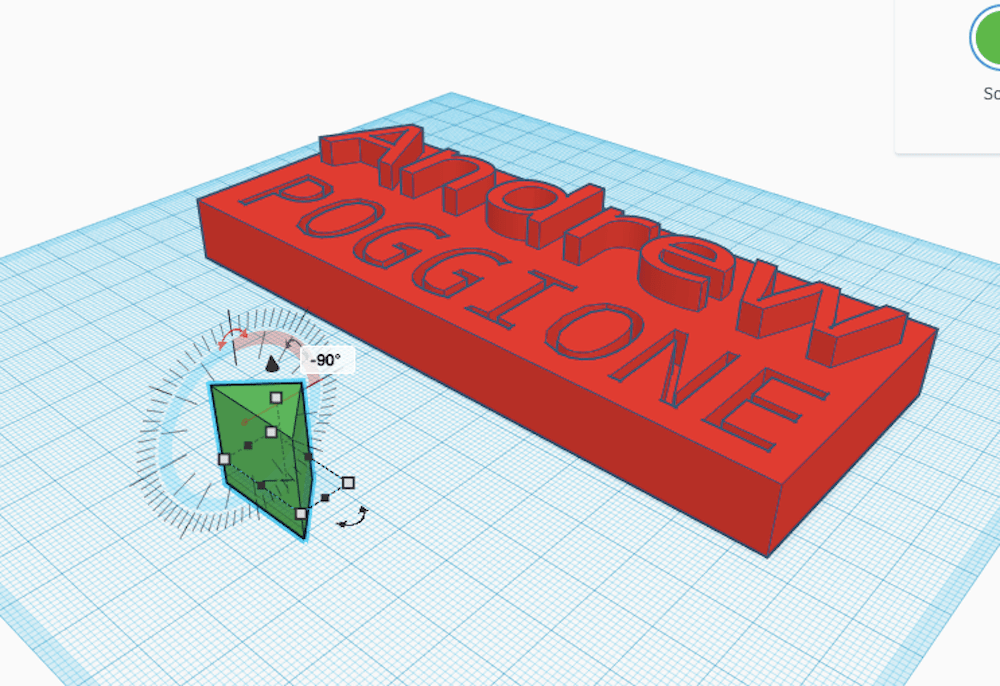
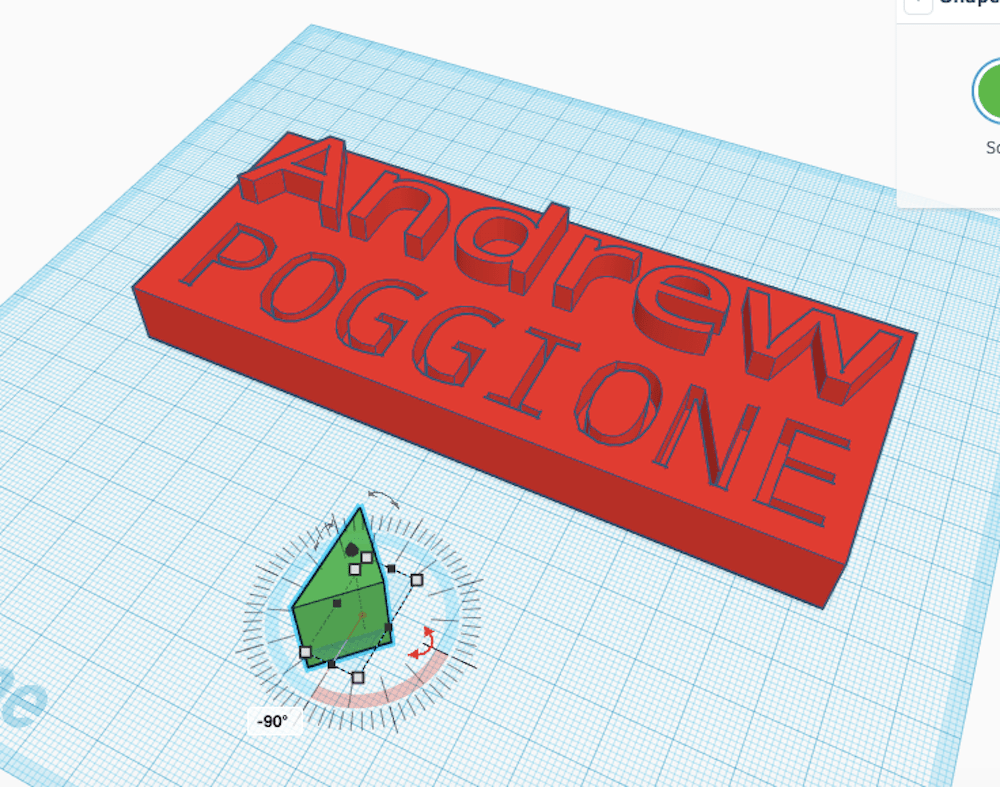
The triangle is still not facing the right direction. We need one more rotation. Use the rotation handle shown in the next screenshot to get the triangle facing the correct direction.
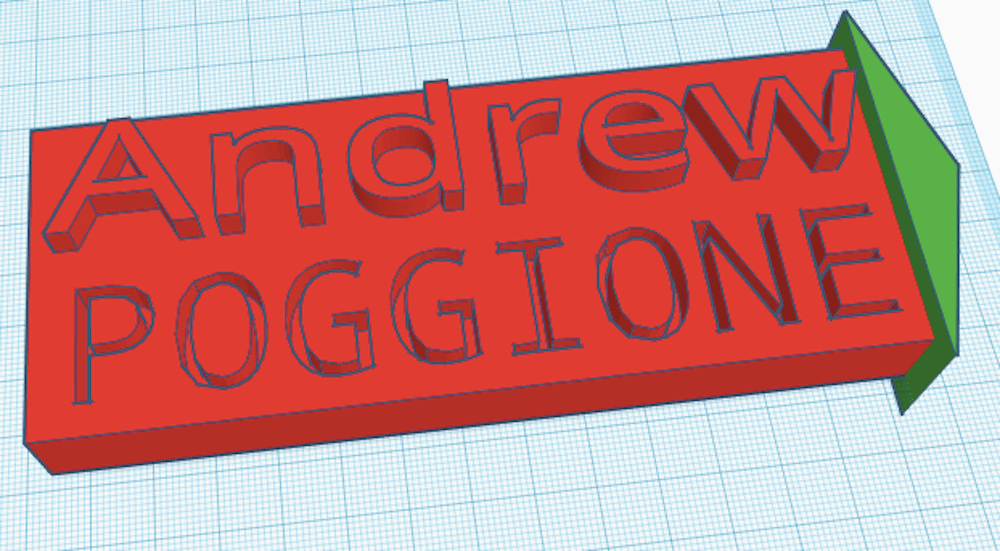
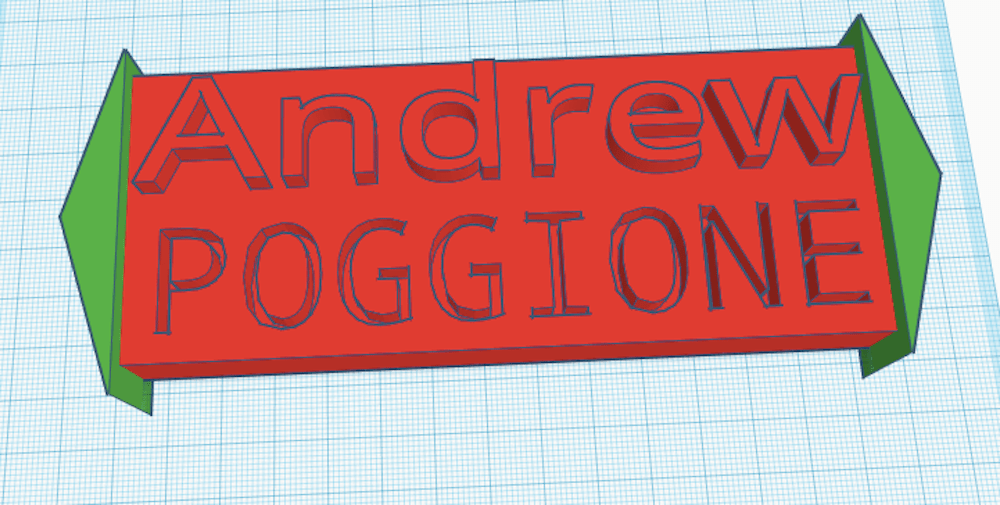
Then size the triangle so it fits at the end of the base.
I even adjusted the green roof height so that it sticks a little a bit higher than the rectangular base. Feel free to adjust the height of the roof to your liking. Now you need one for the other end. Instead of dragging out another shape, rotating it twice, positioning, and sizing it; I will teach you to use the copy and paste command. Click the roof. Then click the copy button in the top left corner. Next hit the paste button which is just right of copy button.
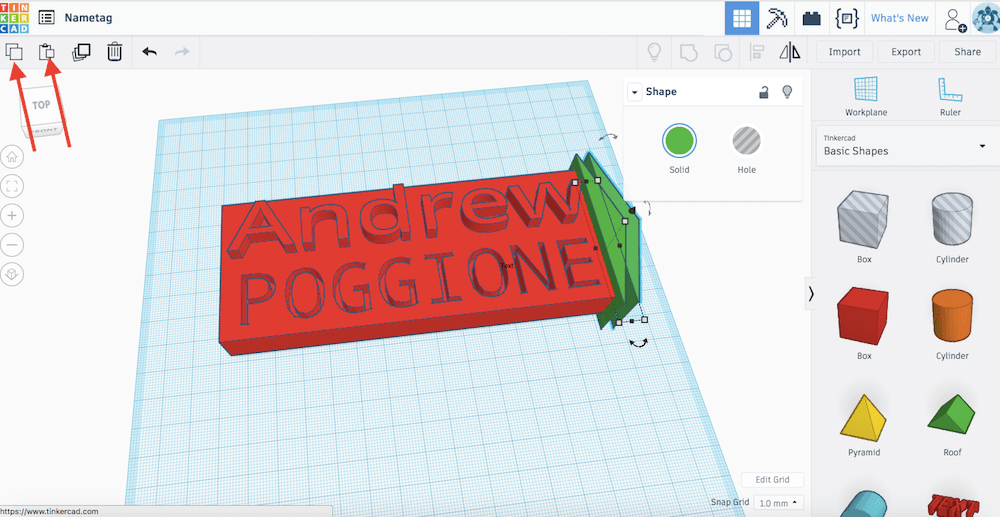
Now you just have to position and rotate the shape once.
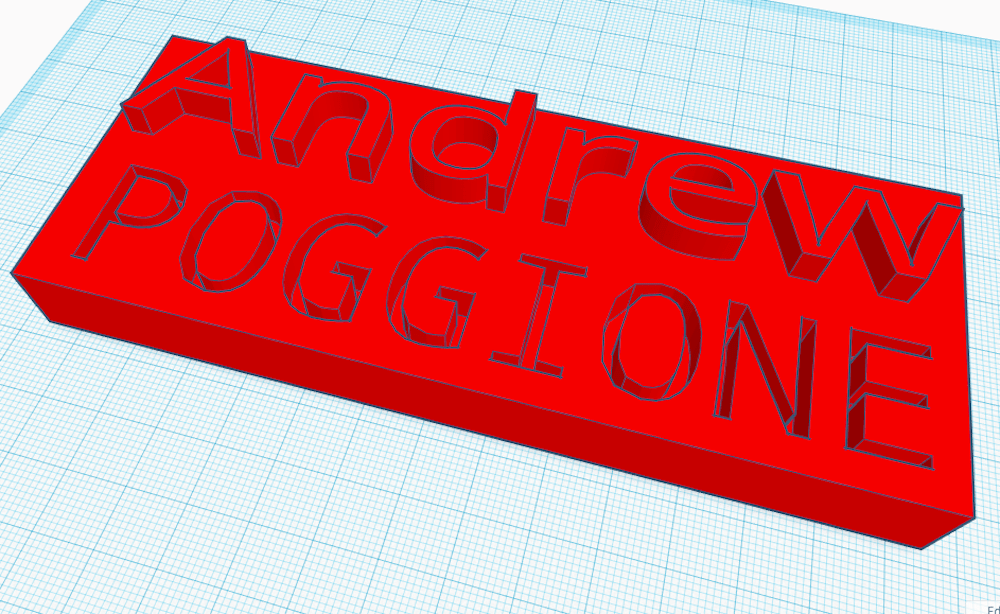
Your nametag is now complete! Be sure to look at your creation from all angles to check for any adjustments.
Your first computer model is complete. Next you’ll need to export your 3D model in a format that 3D printing software can read. Click “Export” in the top right corner.

Then click .STL format.
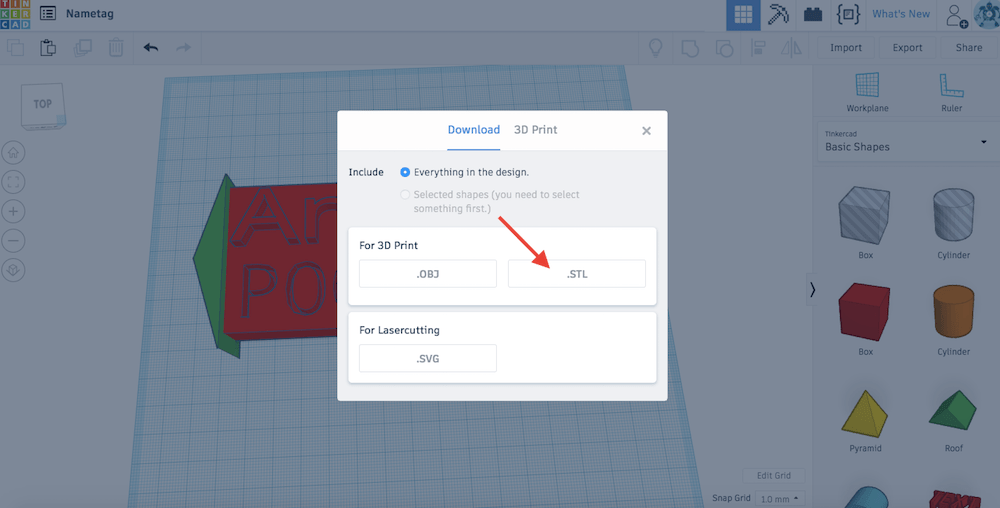
Your .STL format file will now be saved in your downloads folder. If you have a 3D printer available to you, you can print your object. If not, you can at least see how the final steps work.
To print your 3D model you’ll need to run your .STL file through your 3D printer-specific software. Every 3D printer is a little bit different. Its software accounts for the size of your 3D printing bed and allow you to size your models appropriately. That being said, you’ll need to download your 3D printing software onto your computer. You can find generally find it on your 3D printer’s website.
At Spark Skill tech camp, we use Flash Forge printers. Flash Forge brand uses a program called FlashPrint. The FlashPrint software looks like the screenshot below when you first open it.

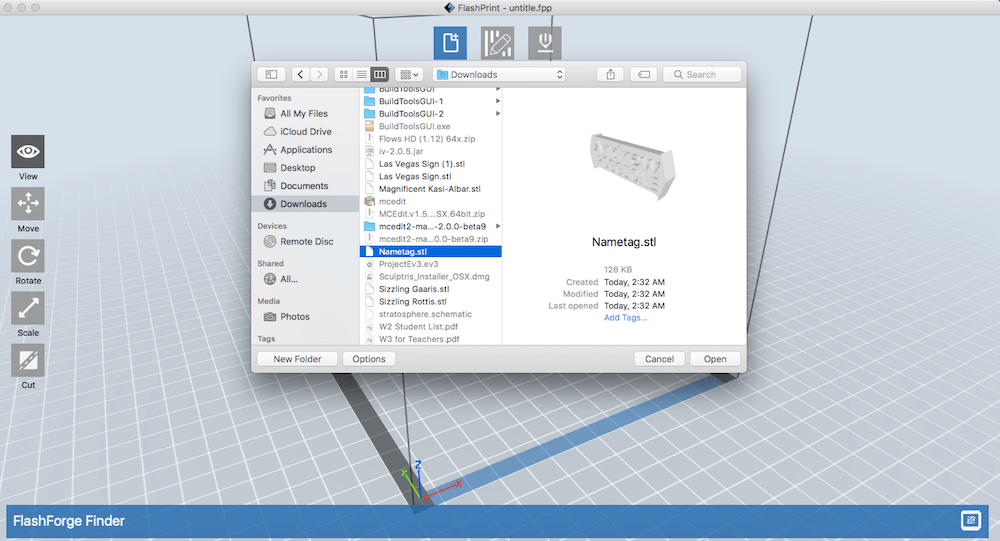
You will need to load your model into FlashPrint. Click the blue “load” button at the top. Then find your file and load it.
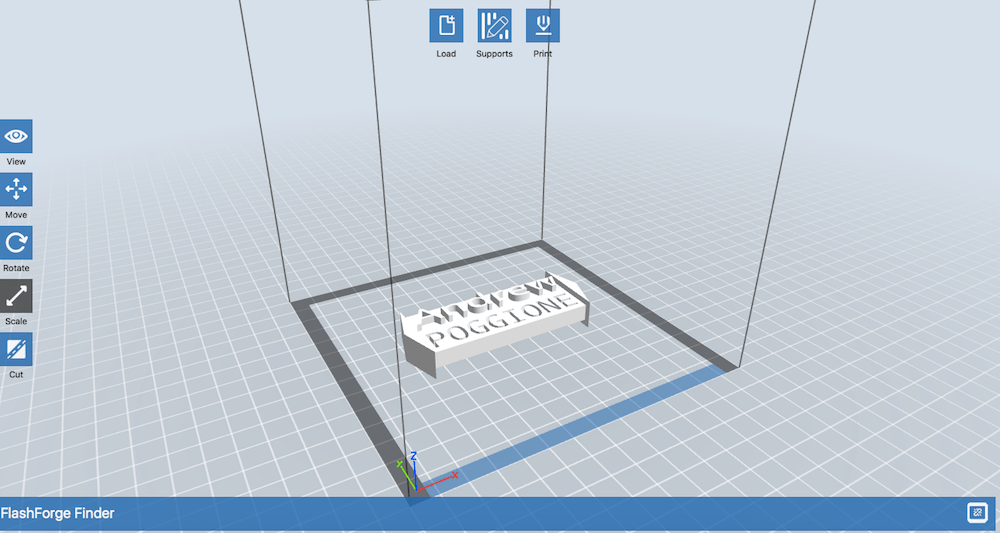
My model is too big for the print bed. I need to click the blue “scale” button on the left to shrink it down. After clicking the button, click and drag on the model to scale it down. My model now fits on the bed and is ready for print, as shown below.
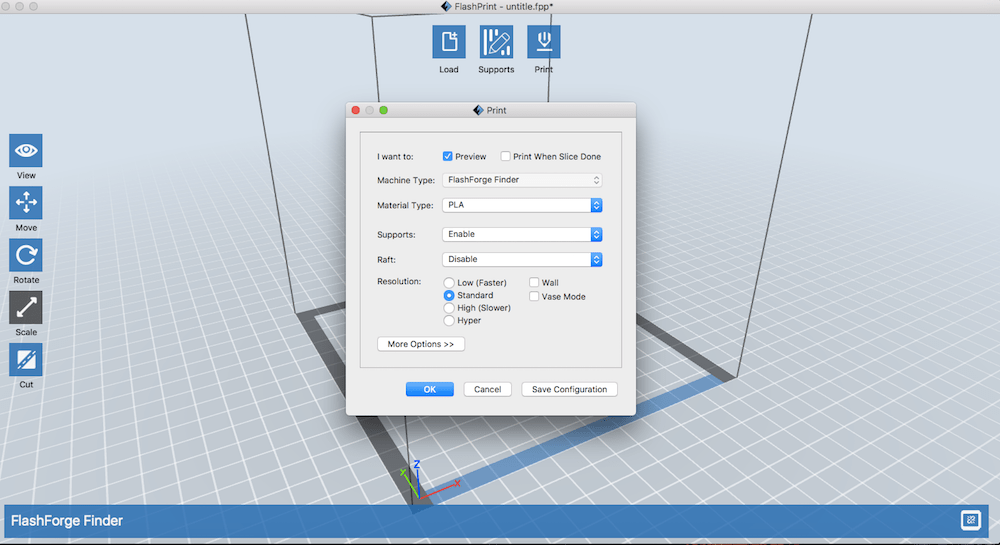
You can now finally select the print button at the top of the screen. It will give you several options for your print which will affect the speed and density of your print. I generally just select standard or fast for prints like this.
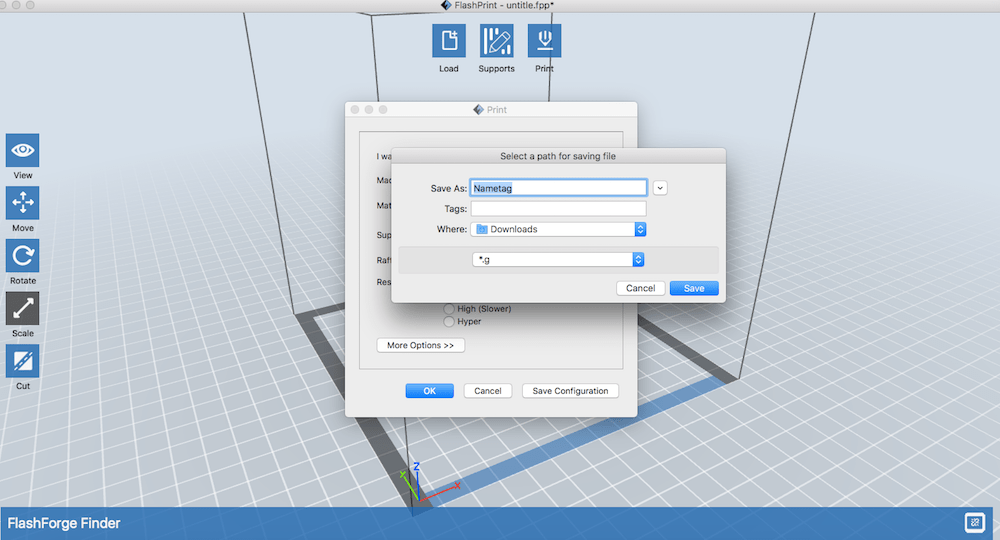
After hitting “OK,” you’ll need to save your file to a flash drive as a *.g (which may be different for non Flash Forge printers). Then you can plug your flash drive into your file and finally get your print going. Depending on the your the size of your model, this print should take about a couple of hours.
This marks the end of this tutorial. I encourage you all to try to make 3D models of your own, construct your own prints, watching 3D printing youtube videos (some of them are truly amazing!), or come to Spark Skill summer camp to learn even more about 3D printing technology!
In this blog you learned first how to create a 3D computer model with Tinkercad, how to export that file as an .STL, how to prepare a file specific for your 3D printer, and finally how to run your 3D print. While the process seems long and complicated at first, a little experience will teach you that a simple 3D print can be designed and printed in a pretty short amount of time.
The 3D printing industry continues to grow rapidly. According to the International Data Corporation’s “Worldwide Semiannual 3D 3D Printing Spending Guide,” global spending in the industry hit 11 billion in 2015 and is projected to grow to $26.7 billion in 2019. As demand continues to grow for 3D printing, businesses will demand for skilled technicians with the technology.
When you print more complicated models, you may notice that some objects just don’t print as well as others. 3D printing is an additive process which means that each object is built layer by layer from the bottom up. This means that it becomes more difficult to print objects which have no support underneath them. In these situations 3D printing software allows you to build impermanent supports which can be taken off after the print. Check out some Youtubes if you want to see what I mean.